
How To Transfer Prints To Wood: An Awesome Photography DIY Project
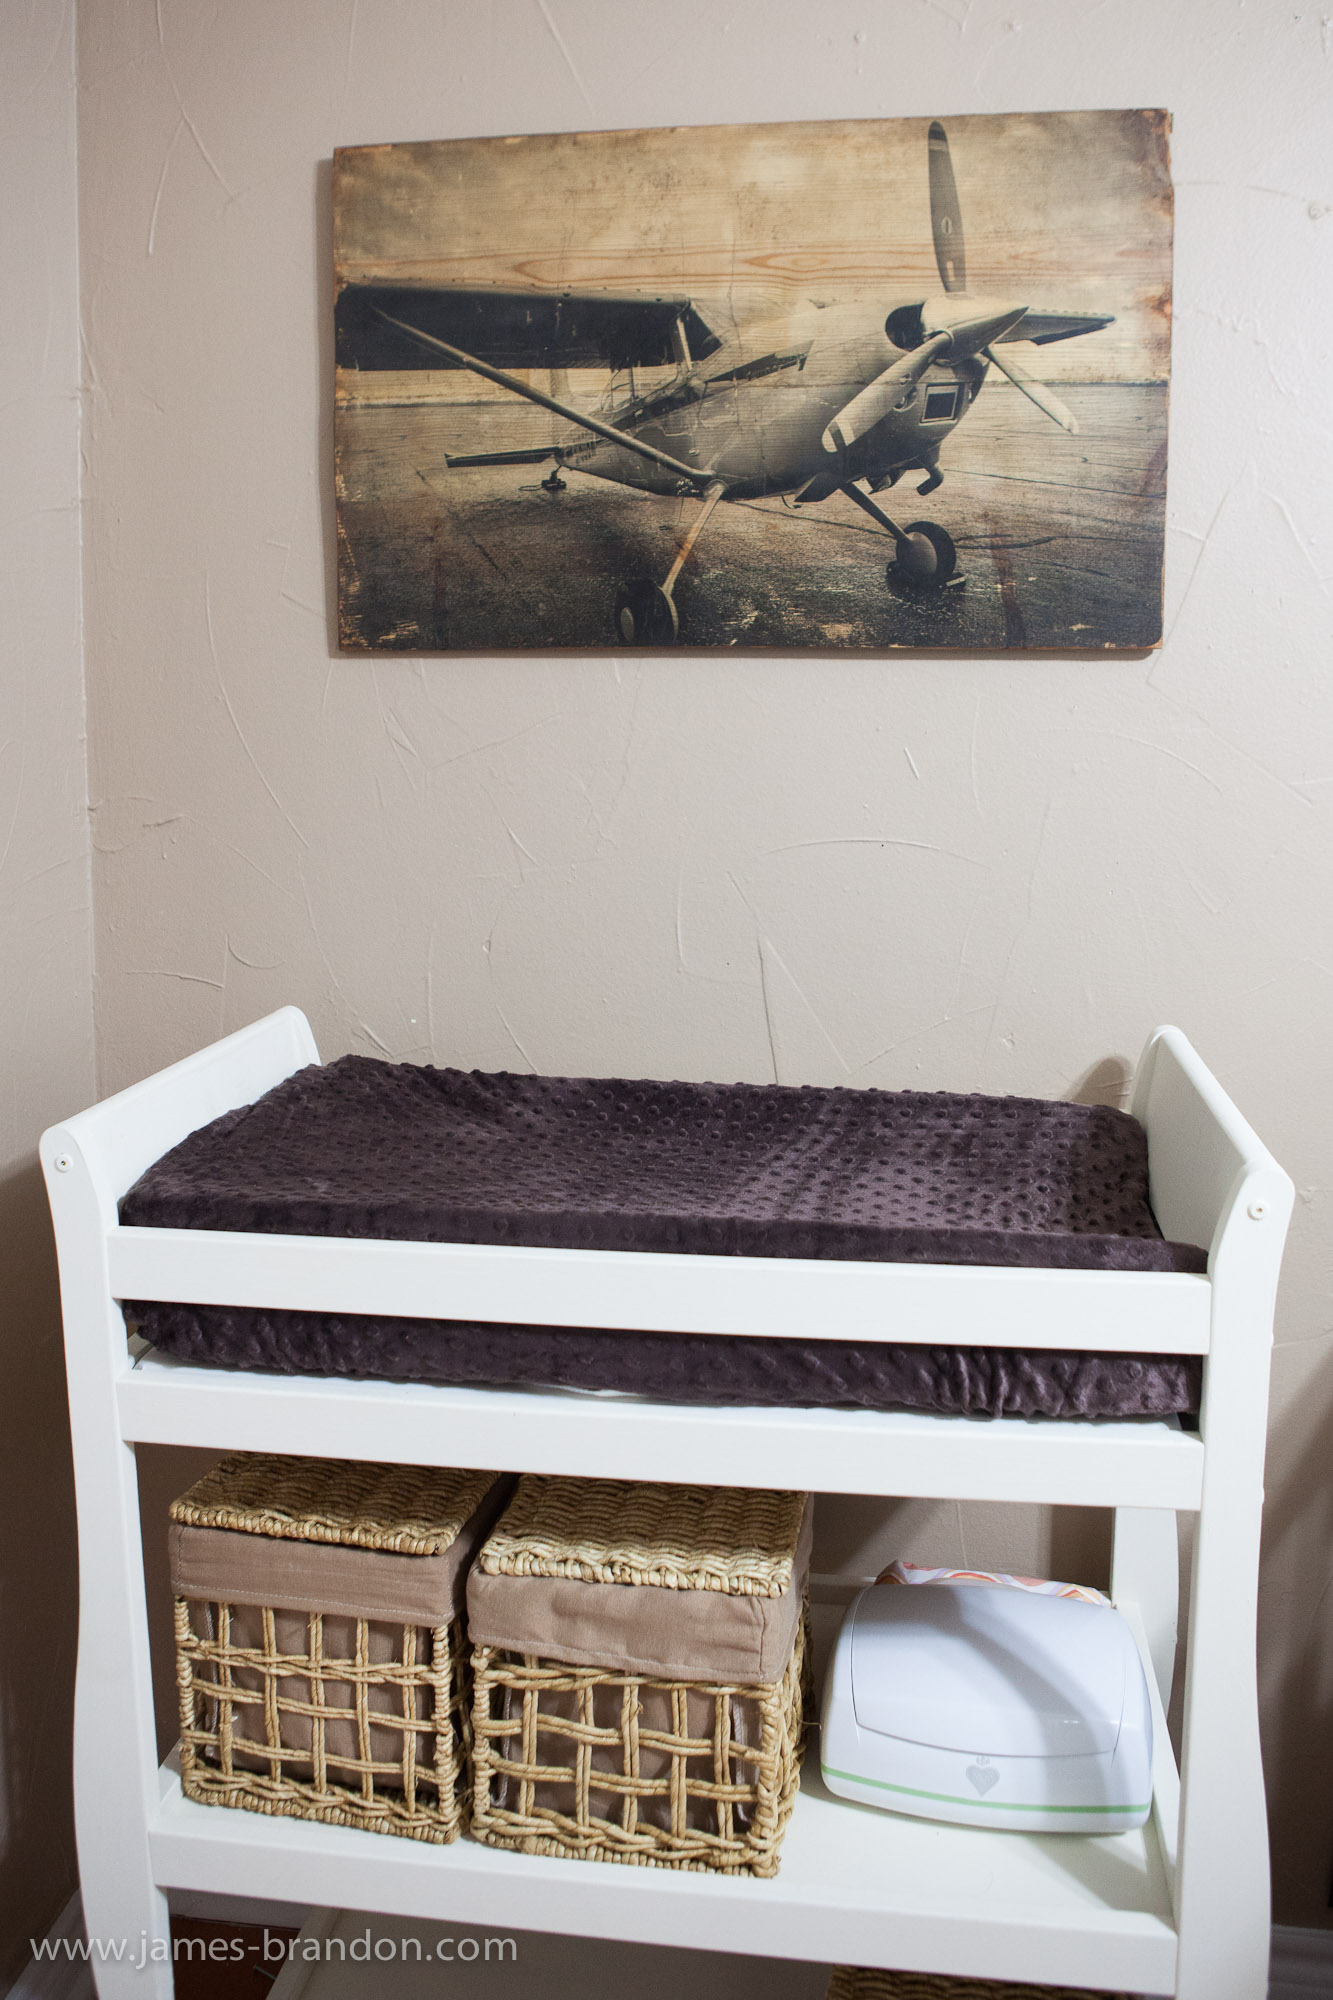
One thing I love about my family is that there never seems to be a shortness of creativity floating around. My wife Kristin works with her mother Lori running a website over at Katie’s Rose Cottage and this project was really just right up their alley. At the time of writing this article Kristin is less than a week away from giving birth to our first child and son Isaac. It’s almost a guarantee that by the time you read this I will be a father! So suffice it to say that Kristin has been doing quite a bit of nesting to get ready for baby Isaac. My father-in-law has a small Cessna and I’ve been working towards getting my pilot’s license for some time now, so because aviation is fast becoming a tradition in our family we decided to do an aviation theme for Isaac’s room.
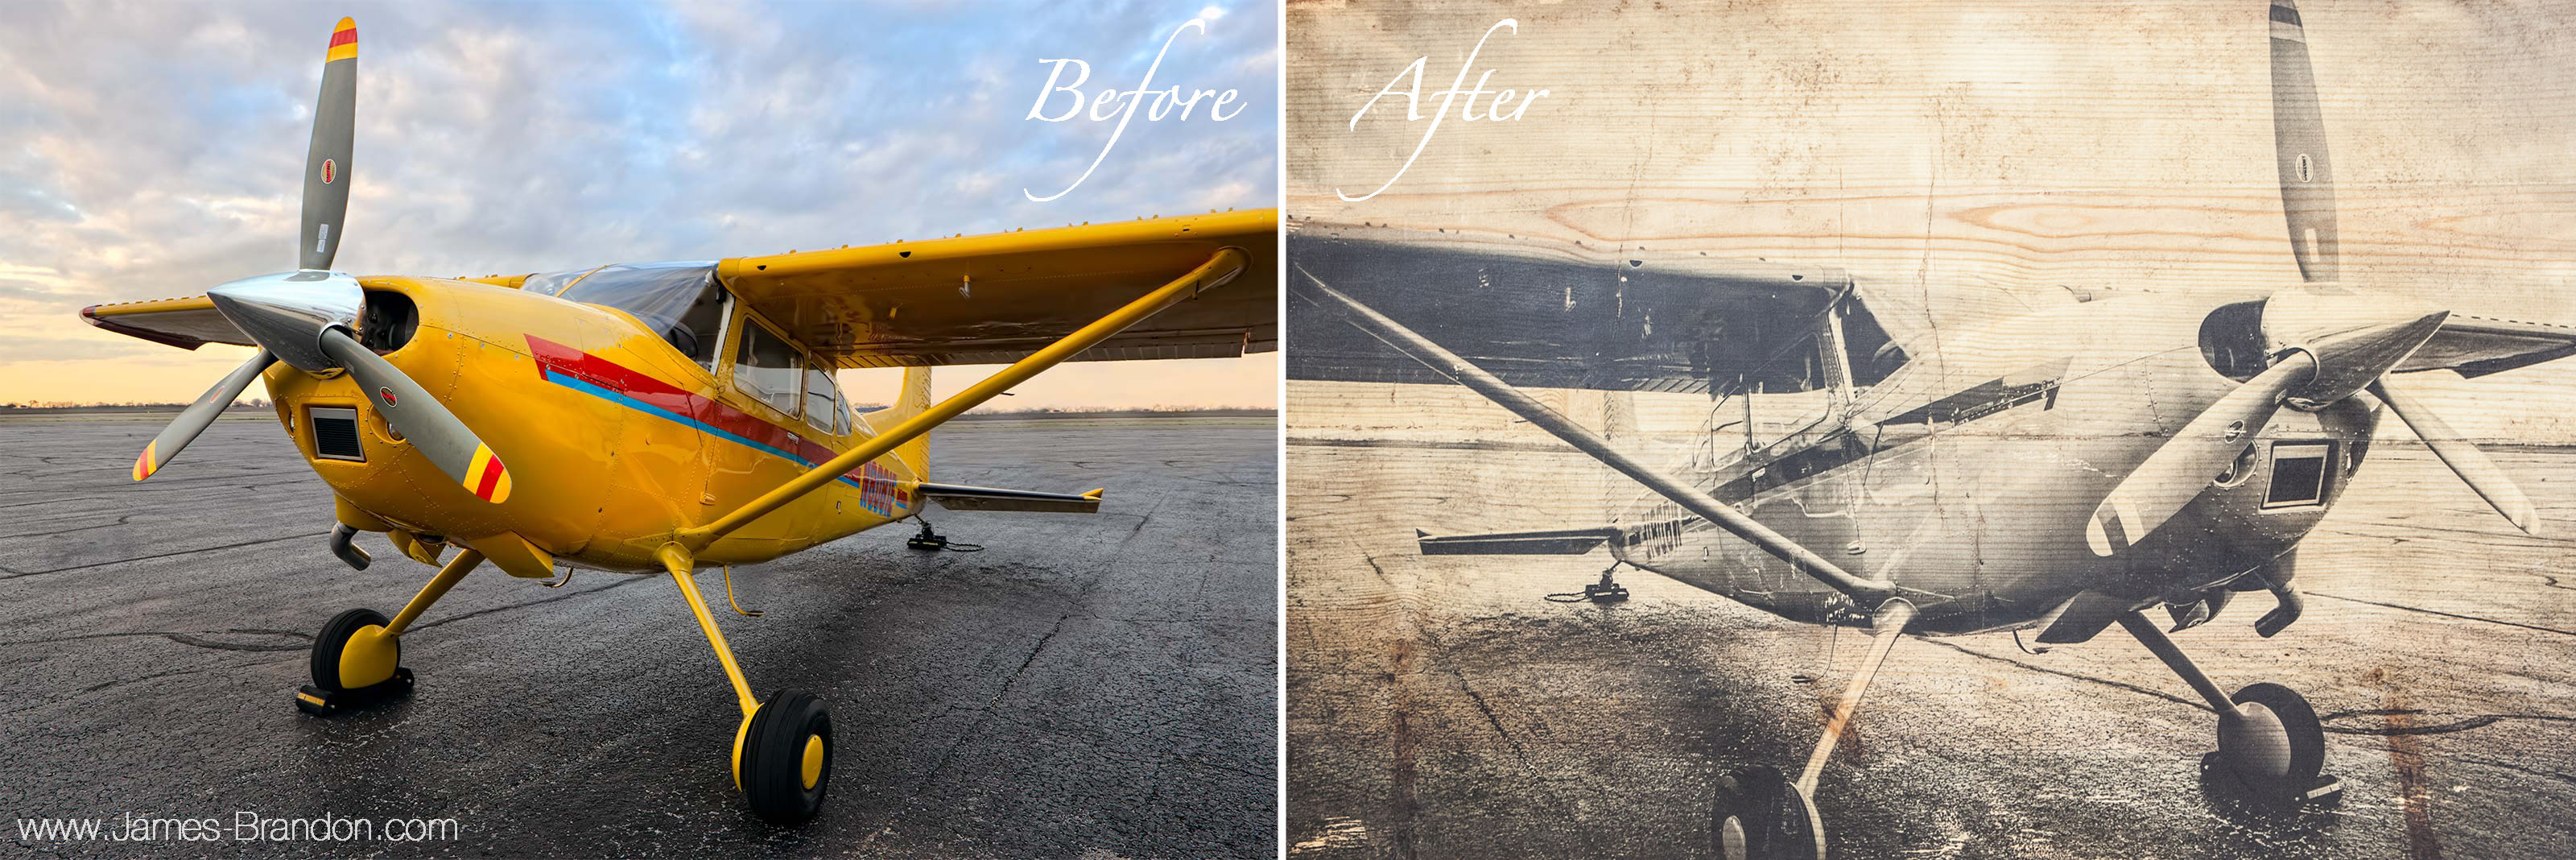
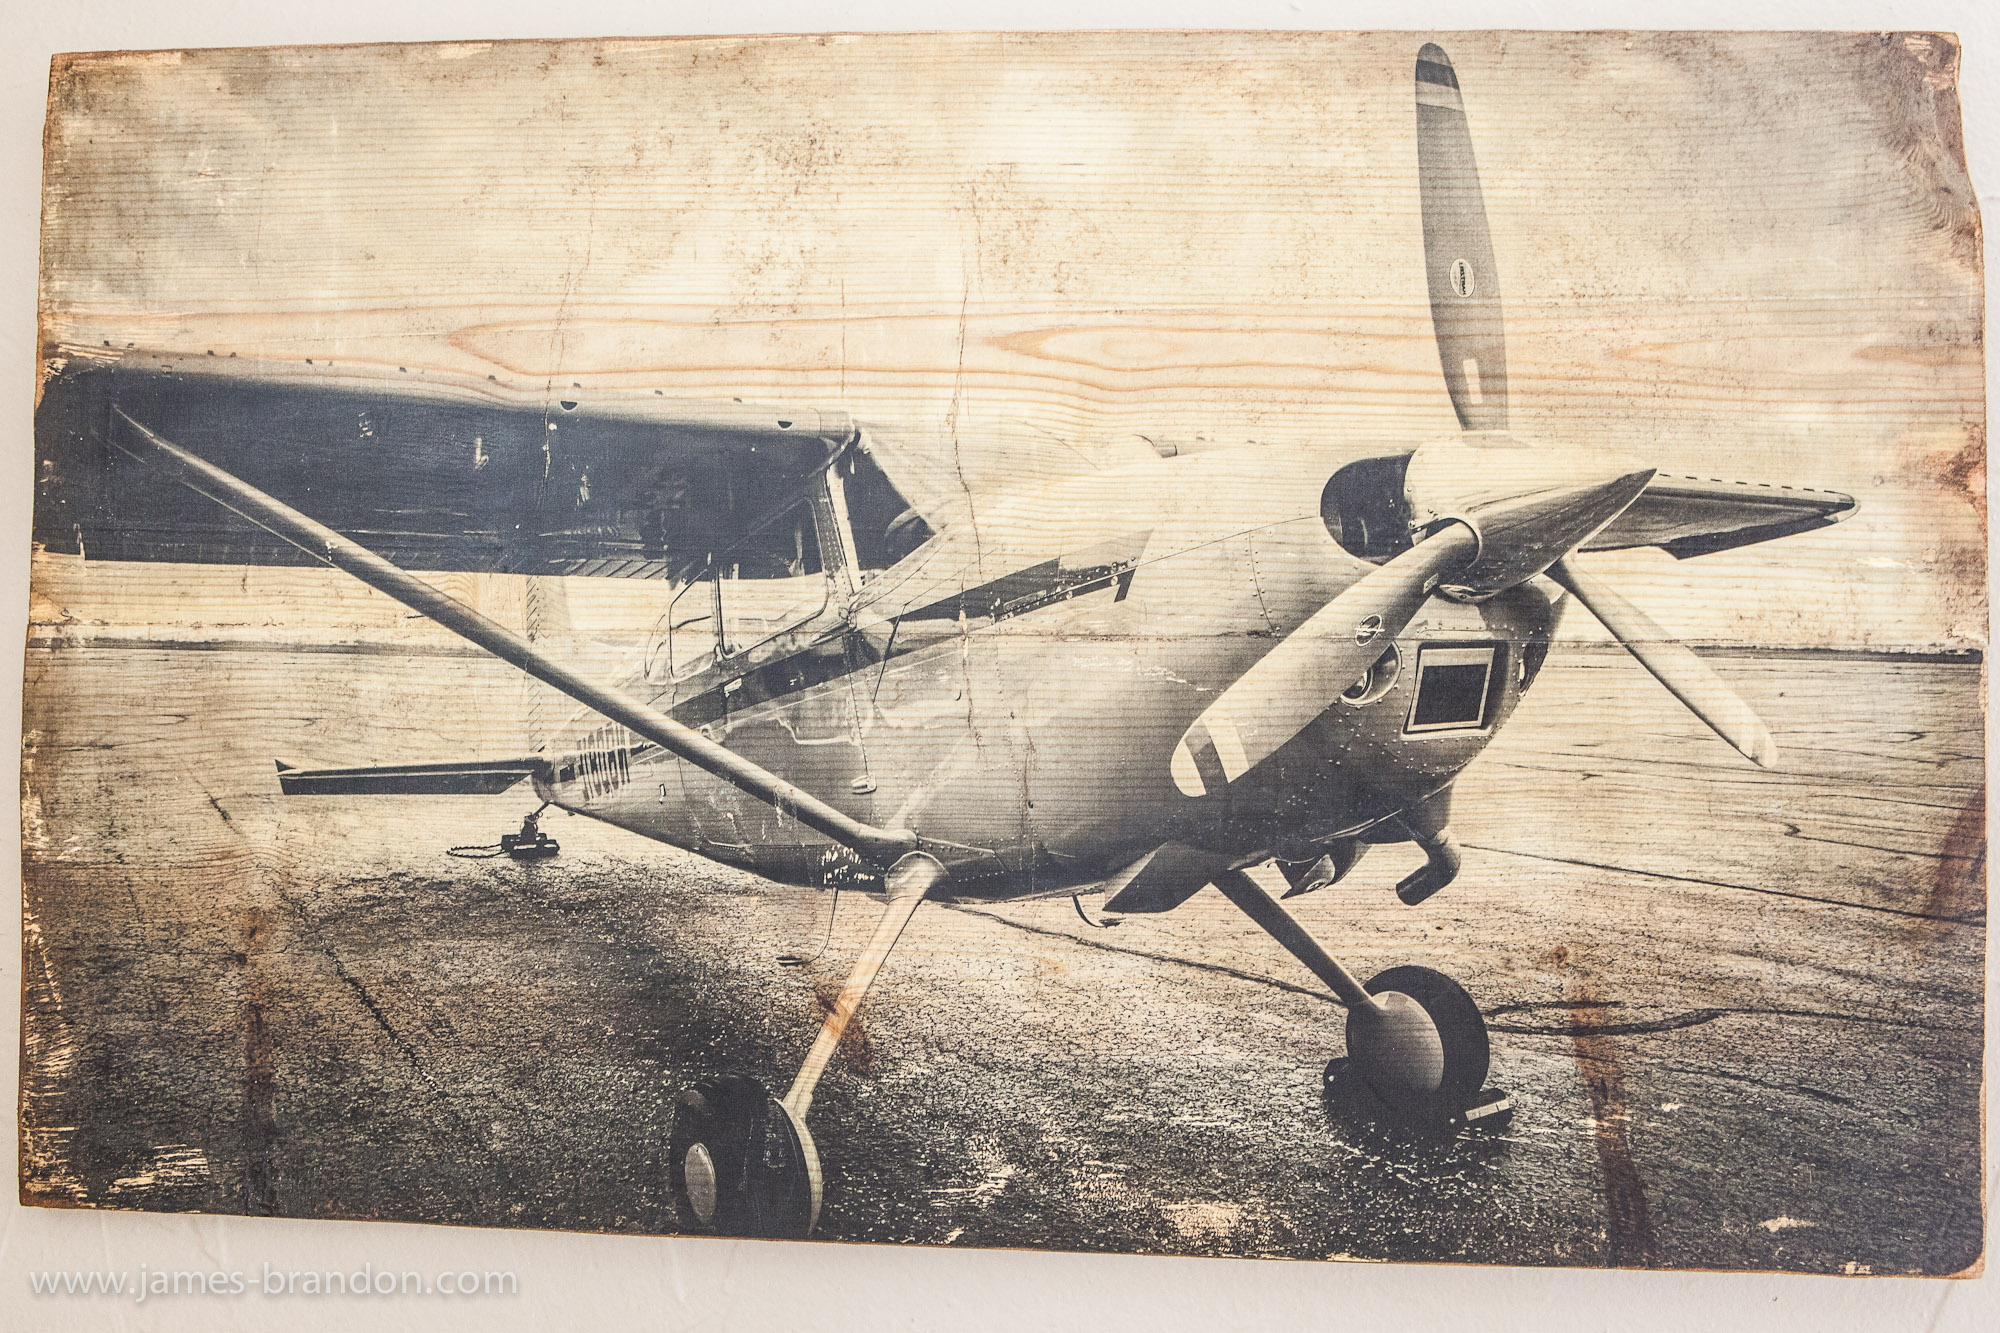
I have several aviation photos in my portfolio and Kristin said she wanted to print the photo on wood. I had no idea what she was talking about or how that was even possible but I listened and let her do her thing. So here’s how to get from the ‘Before’ image to the ‘After’ image, you’re gonna love it!
Step 1: Needed Supplies
Here’s a list of supplies we used. You don’t have to necessarily use the exact same ones in every case but if you do I’ll let you know.
- Laser printed photo
- Wood cut to the same size as photo
- Gel Medium (must be an acrylic gel medium)
- Brush to apply gel medium to wood
- Butter knife or flat instrument to smooth out print onto wood
- Wood stain (optional) and rags
- Pigment (optional)
- Sander or sand paper
- Soft Wax or Mod Podge to smooth and seal print
- Brush to apply wax
- Hanging brackets
- Fastening brackets (if multiple pieces of wood are used)
Step 2: Finding A Print And Choosing A Look
The first step is obviously to find just the right print that you want transfered over to wood. If you took a look at my wife’s website then you can see that a lot of their stuff is very distressed and vintage looking. So my high resolution, vibrant and clean looking airplane photo just wasn’t going to work in it’s current state. So I took the image into Lightroom and converted it to black and white, bumped up the contrast quite a bit and added some film grain.
Step 3: Getting A Print Made And Getting Some Wood
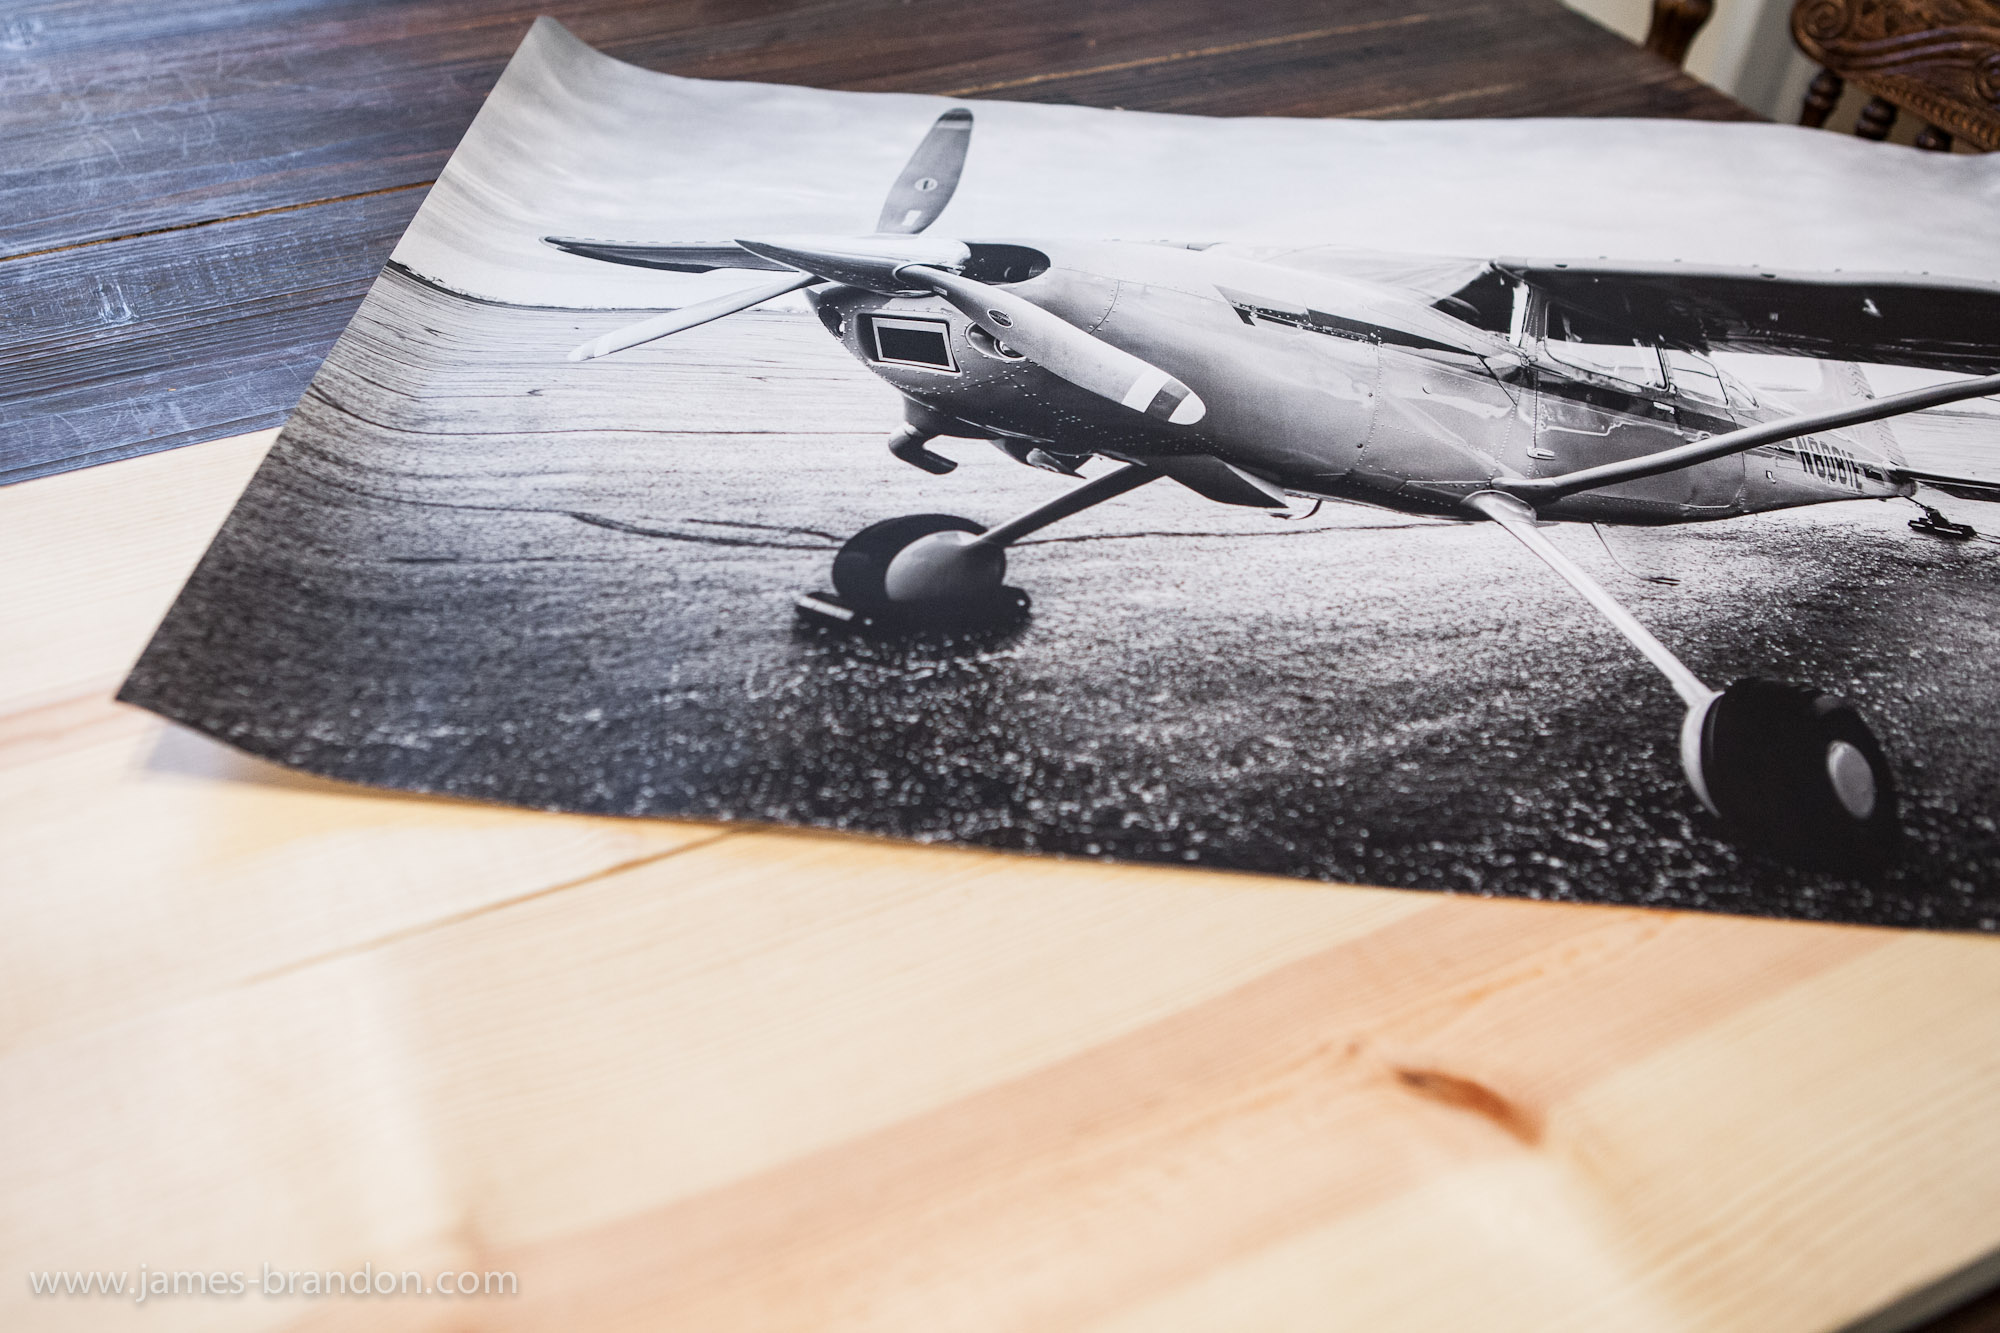 This is VERY important: The image that you print for this project MUST be a laser jet print. Ink Jet will not work with this process so don’t even try it. We decided to get a 20×30 print made so we went up to Staples to have it made from a file we brought up there on a thumb drive. The 20×30 laser jet print cost us a mere $2.14 including tax and looked impressive for such a bargain!
Next we went to Home Depot to get some wood made. Kristin just got two pieces of wood that together measured 20×30. She wanted two separate pieces of wood but you could just as easily use a single piece of wood. Just whatever your preference is.
Step 4: Apply Gel Medium To Wood
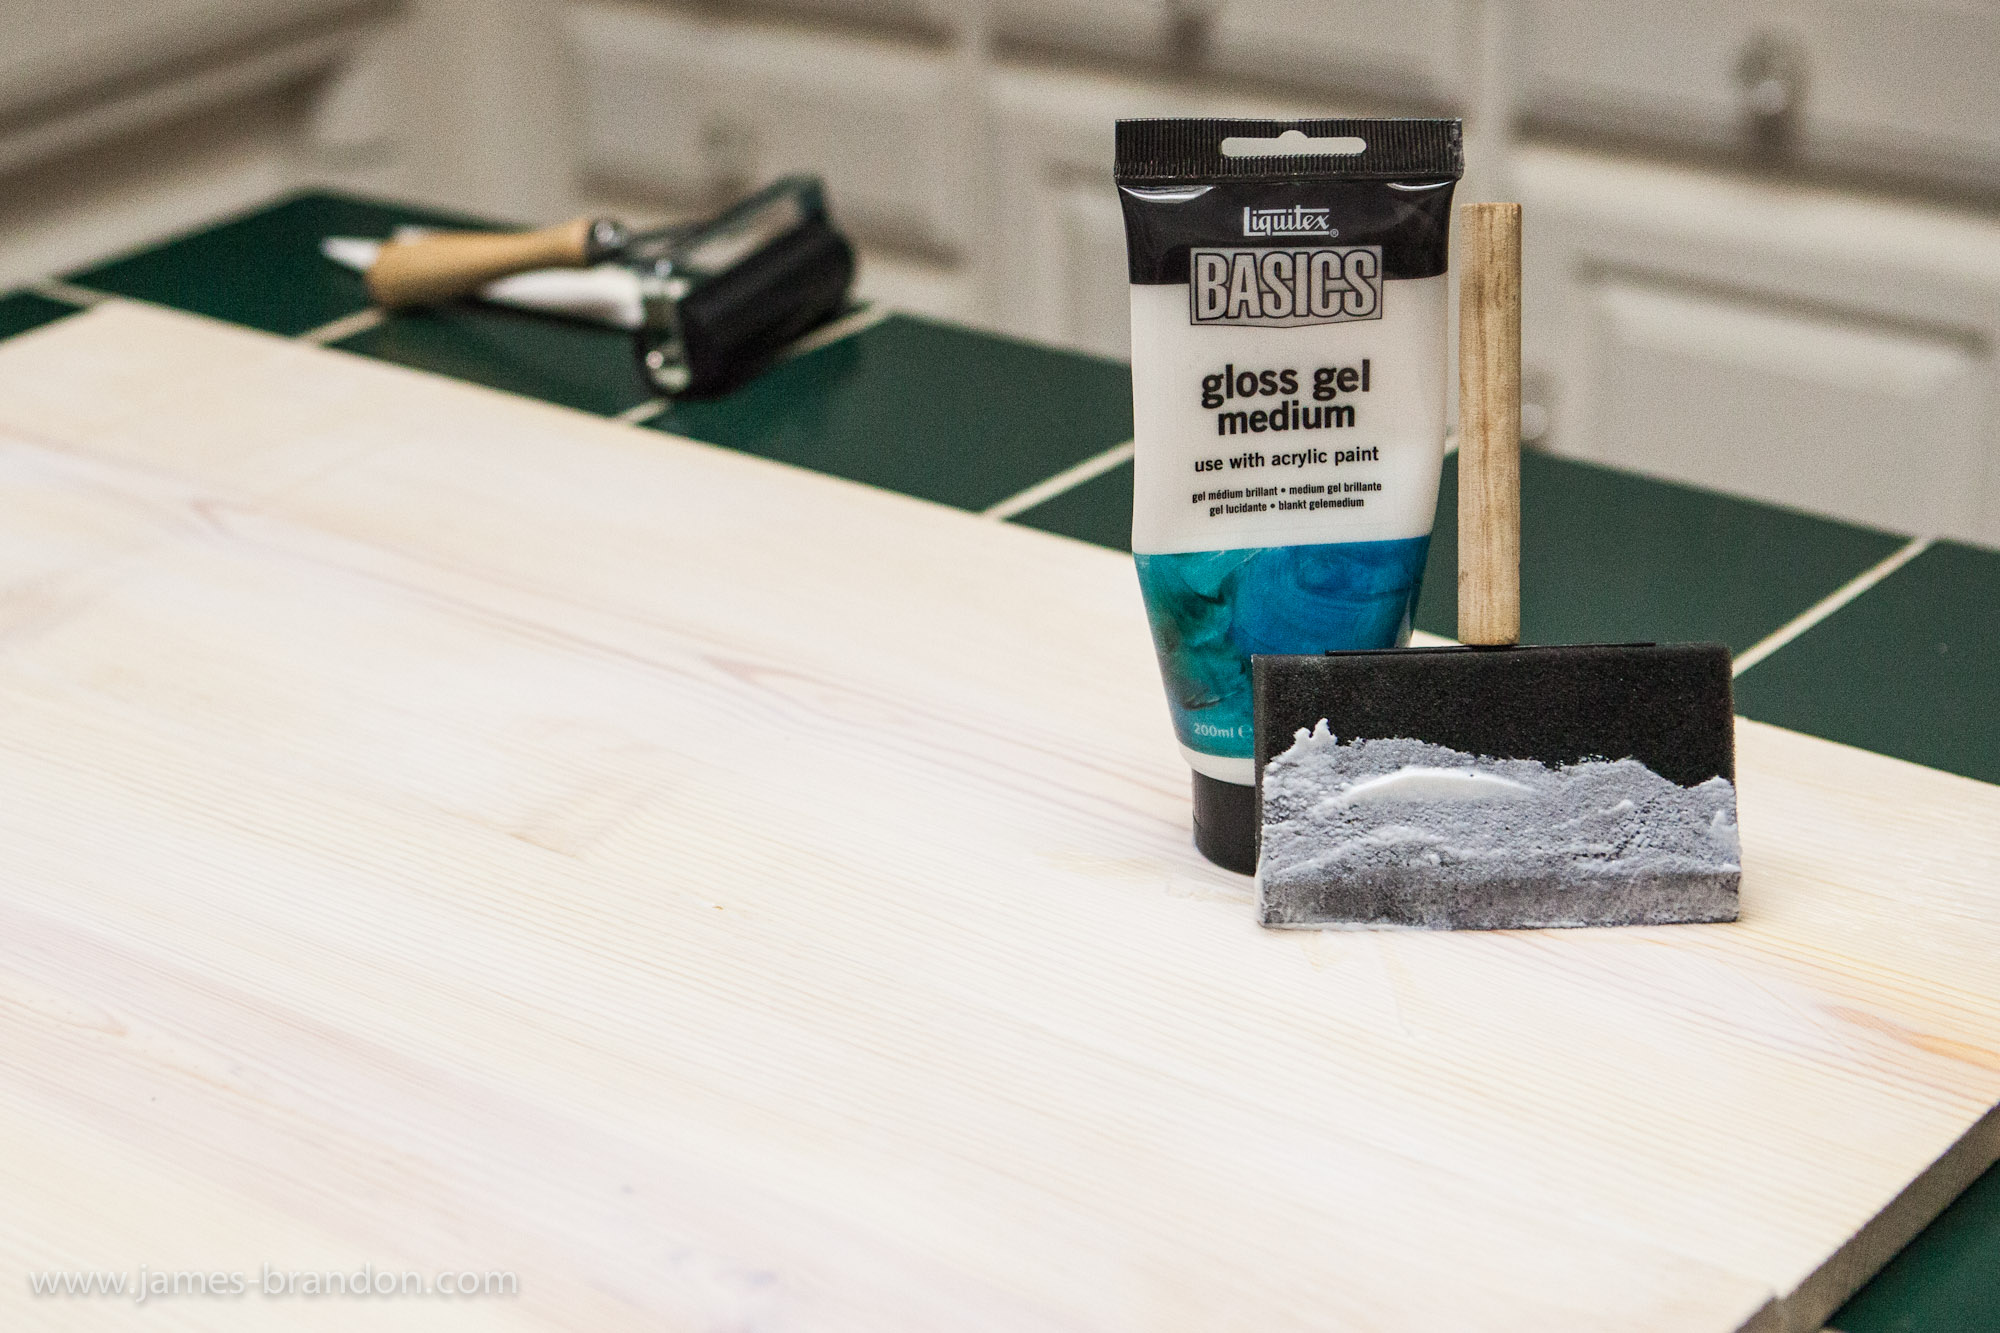 This is really the most crucial step. Apply a single layer of the gel medium to the entire surface of the wood. Not too thin but not gloopy either. If you get the layer too thick the paper will be hard to get off when it’s done setting. Too thin and the paper won’t stick at certain points and the print may not transfer. So you’ll just have to eyeball it here and do your best to make a nice, even layer.
After the gel medium is applied, it’s time to place the print face down onto the wood. This is just as nerve racking as trying to put a protective shield over your iPad or iPhone but it’s a step you have to take! There will no doubt be air bubbles in the print. Do your best to smooth out and eliminate as many of these as you can. We used a plastic tool that we found laying around but you can also use a butter knife, a ruler, a roller or anything you can find that you think might work.

Once the print is applied to the wood, let it sit overnight and make sure it nobody messes with it!
Step 5: Remove Paper From The Wood To Reveal Print
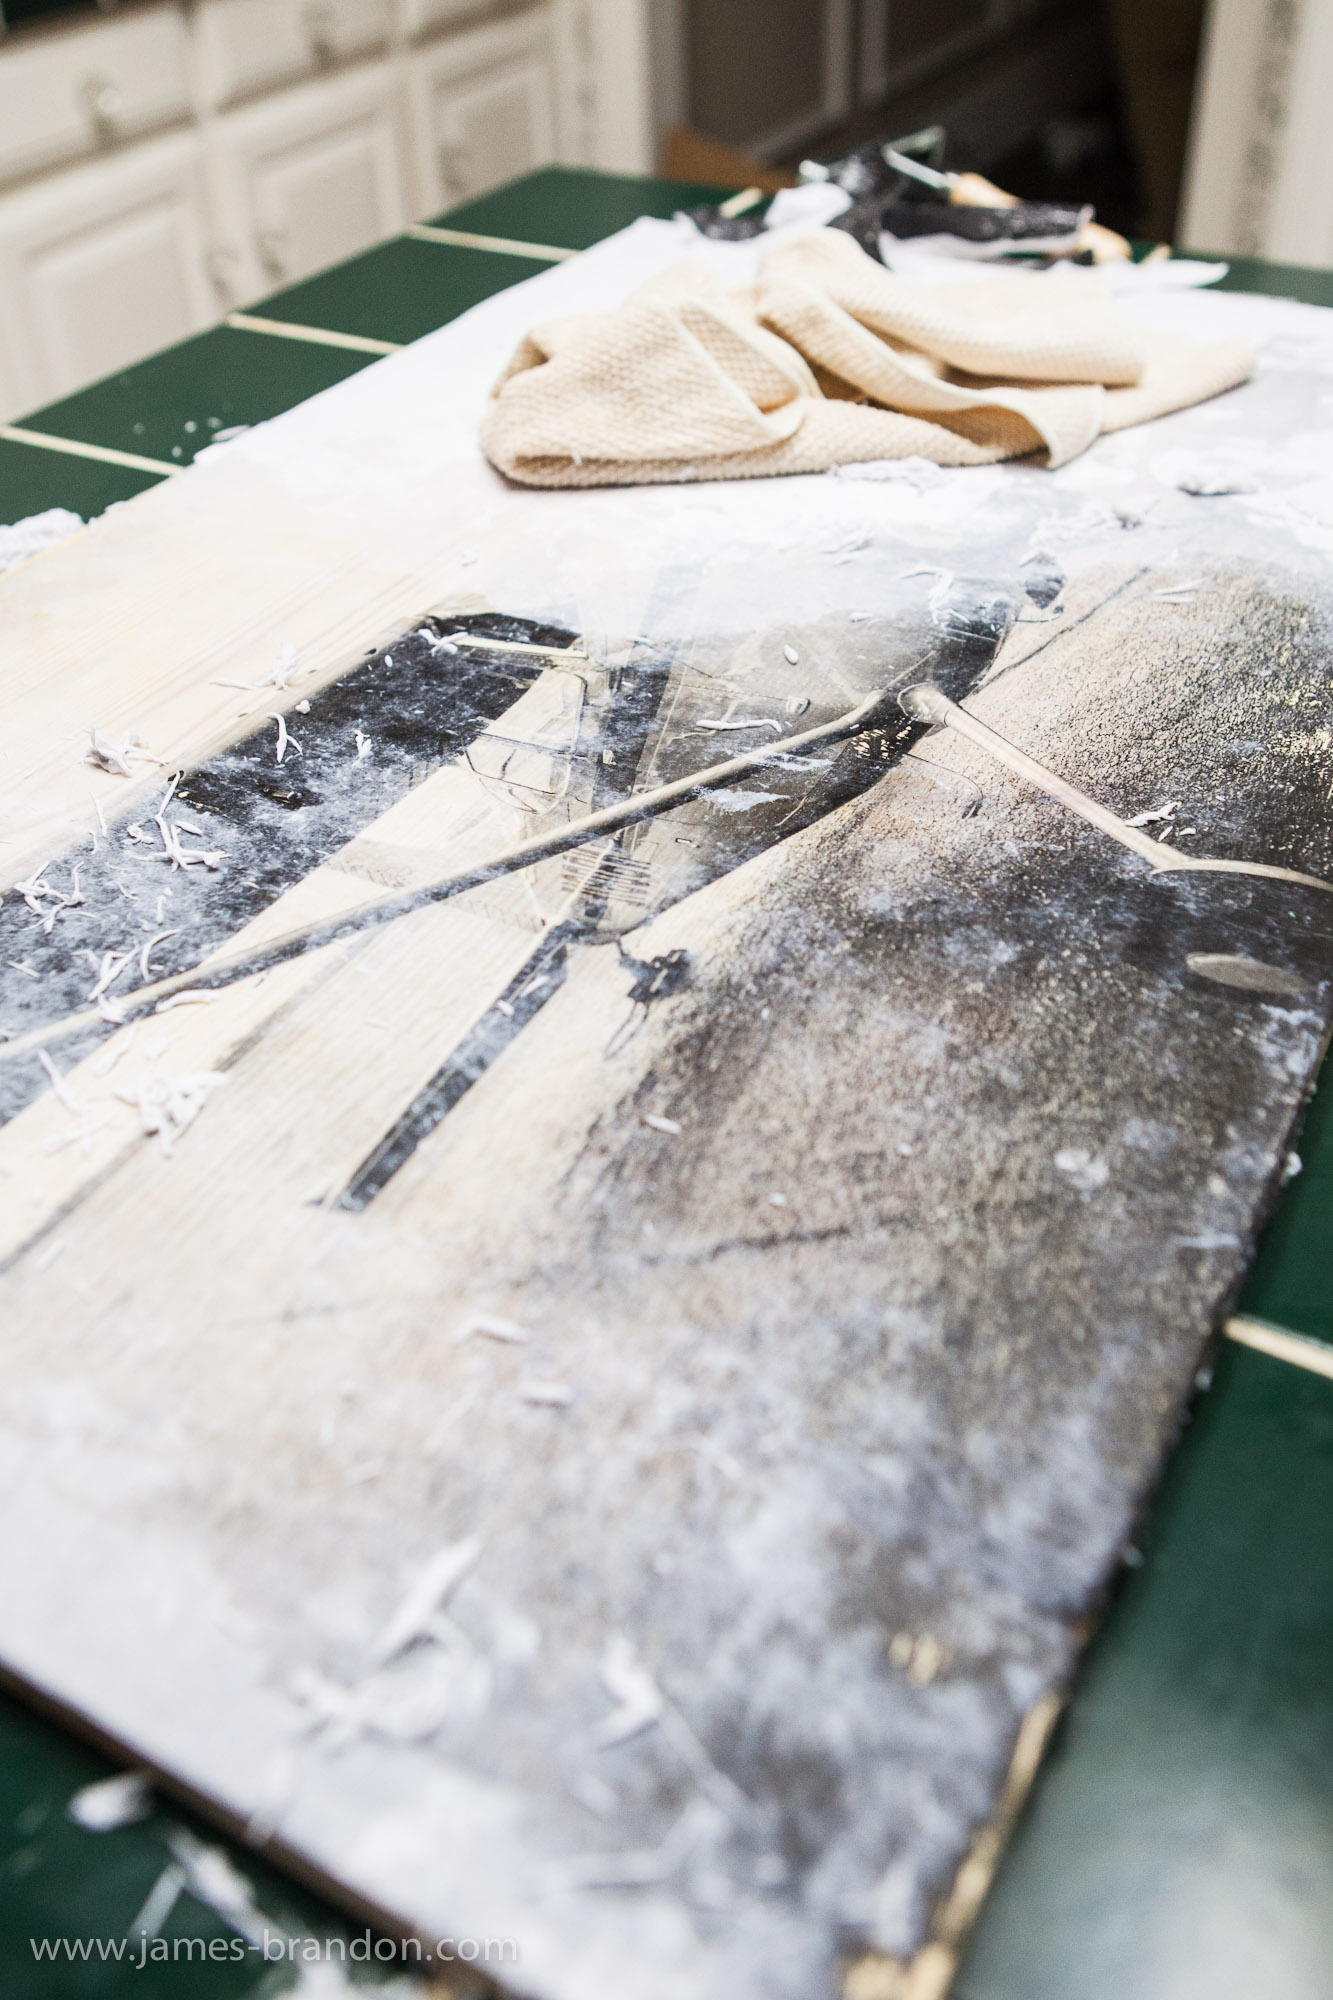 This is the really fun part. To remove the paper we just got the paper wet with water and used our fingers to rub it off. This is a pretty messy process and there might be a better way but fingers seemed to work best for us. Some parts of the print will come off easier than others so just know that your fingers and hands might be a little tired at the end. This whole process might have to be repeated several times and will probably take around 10-20 minutes. But it is really exciting to see the print come to life on the wood. Be sure to have a vacuum cleaner on stand by because there will be a mess to clean up!
Step 6: Finishing the Print
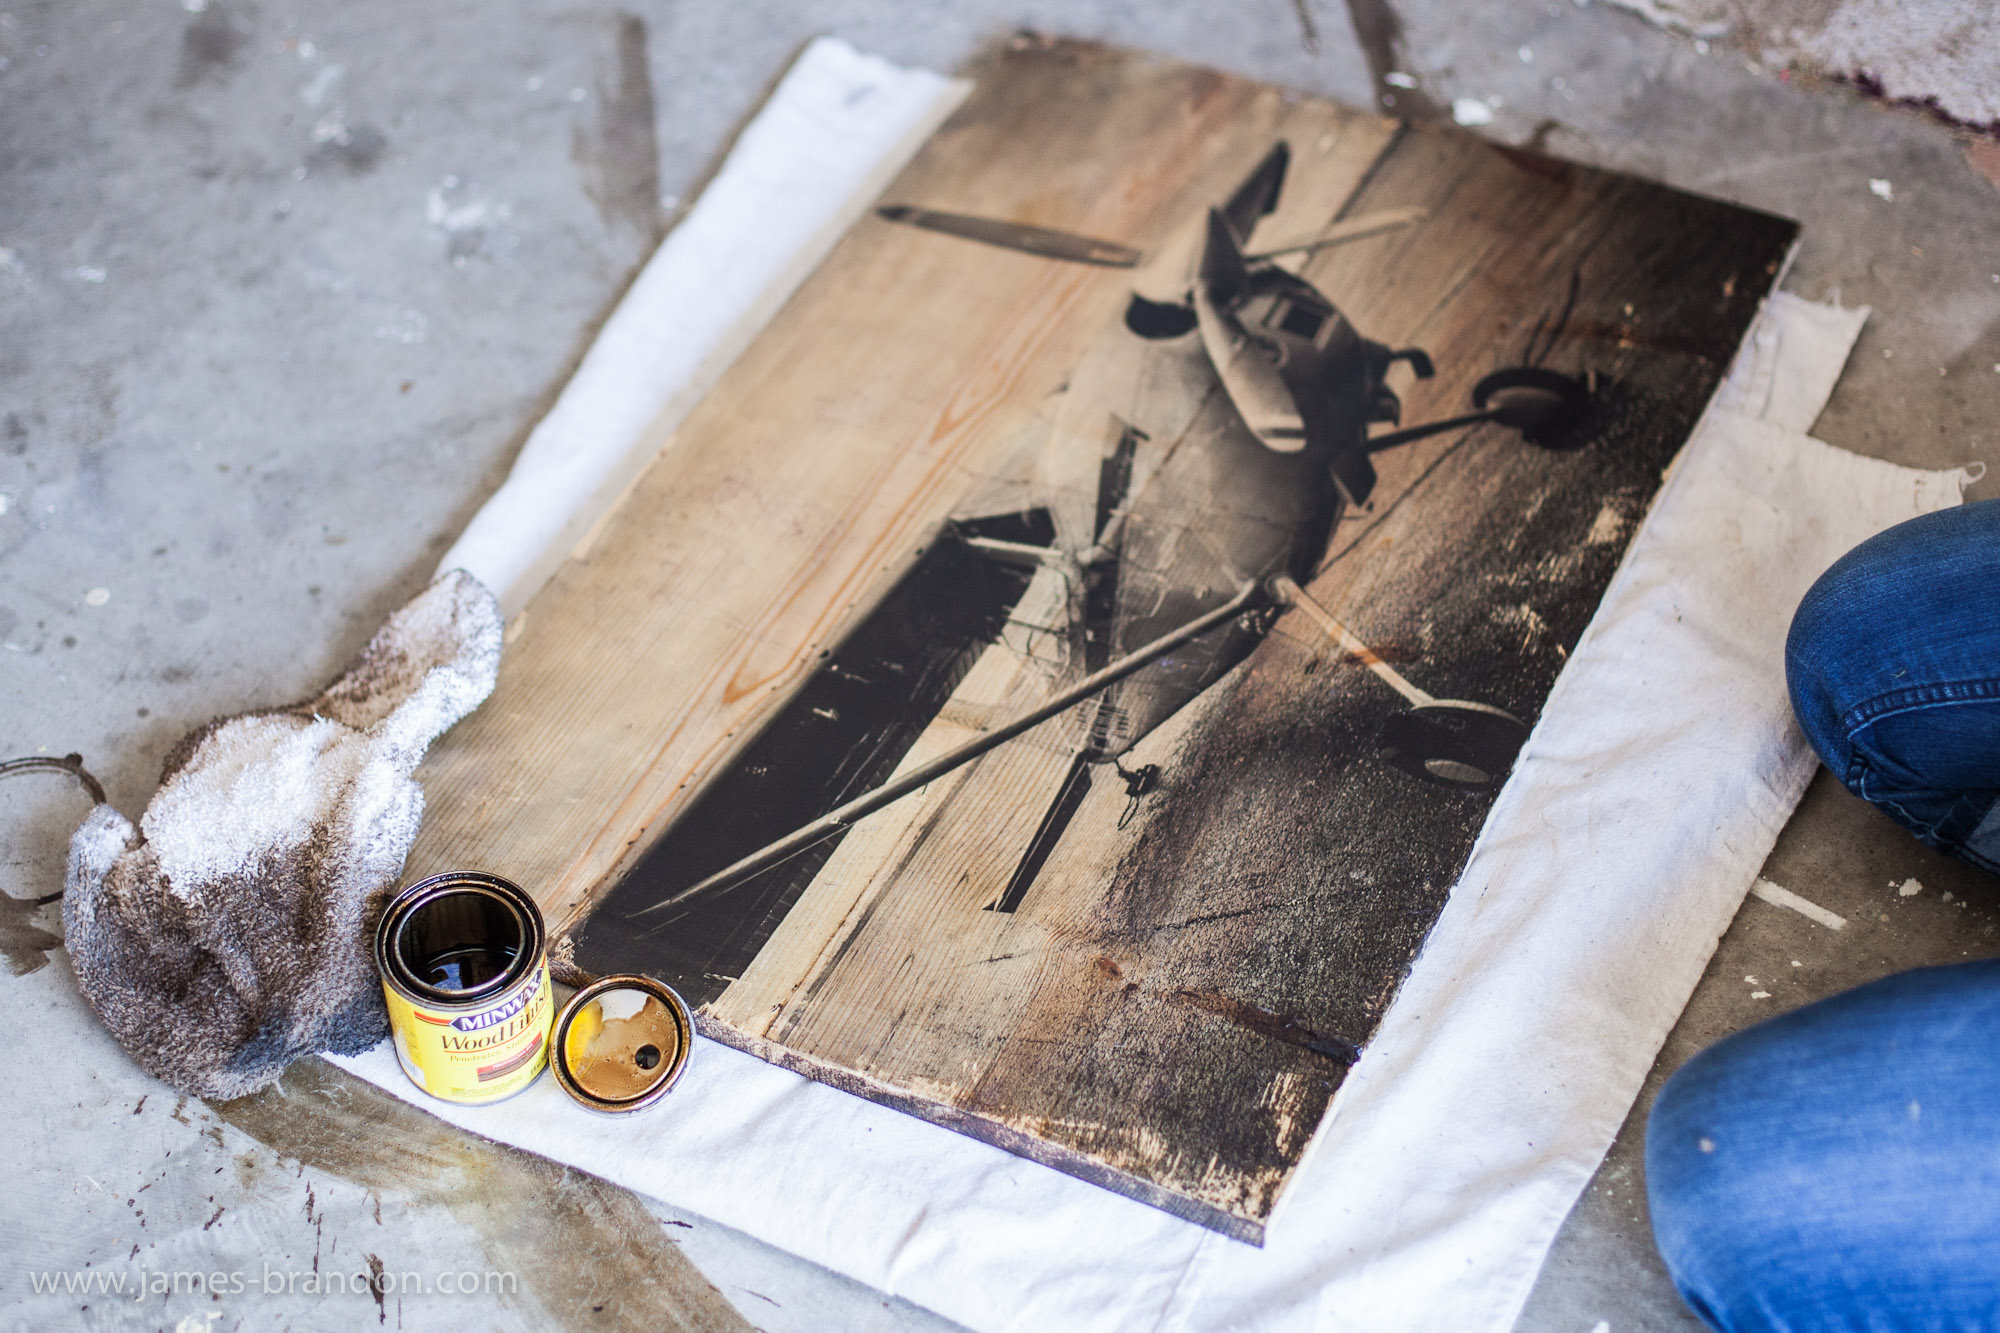
This step is where Kristin took some creative freedom to get the look she wanted for Isaac’s room. She wanted the print to look old and vintage so that’s what she did. First we applied a single layer of wood stain to the entire surface. You have to be careful with wood stain though. The longer you leave it on the wood the darker the stains effect is so we would apply the stain with a rag, let it set for a few seconds and then rub it off with the same rag.
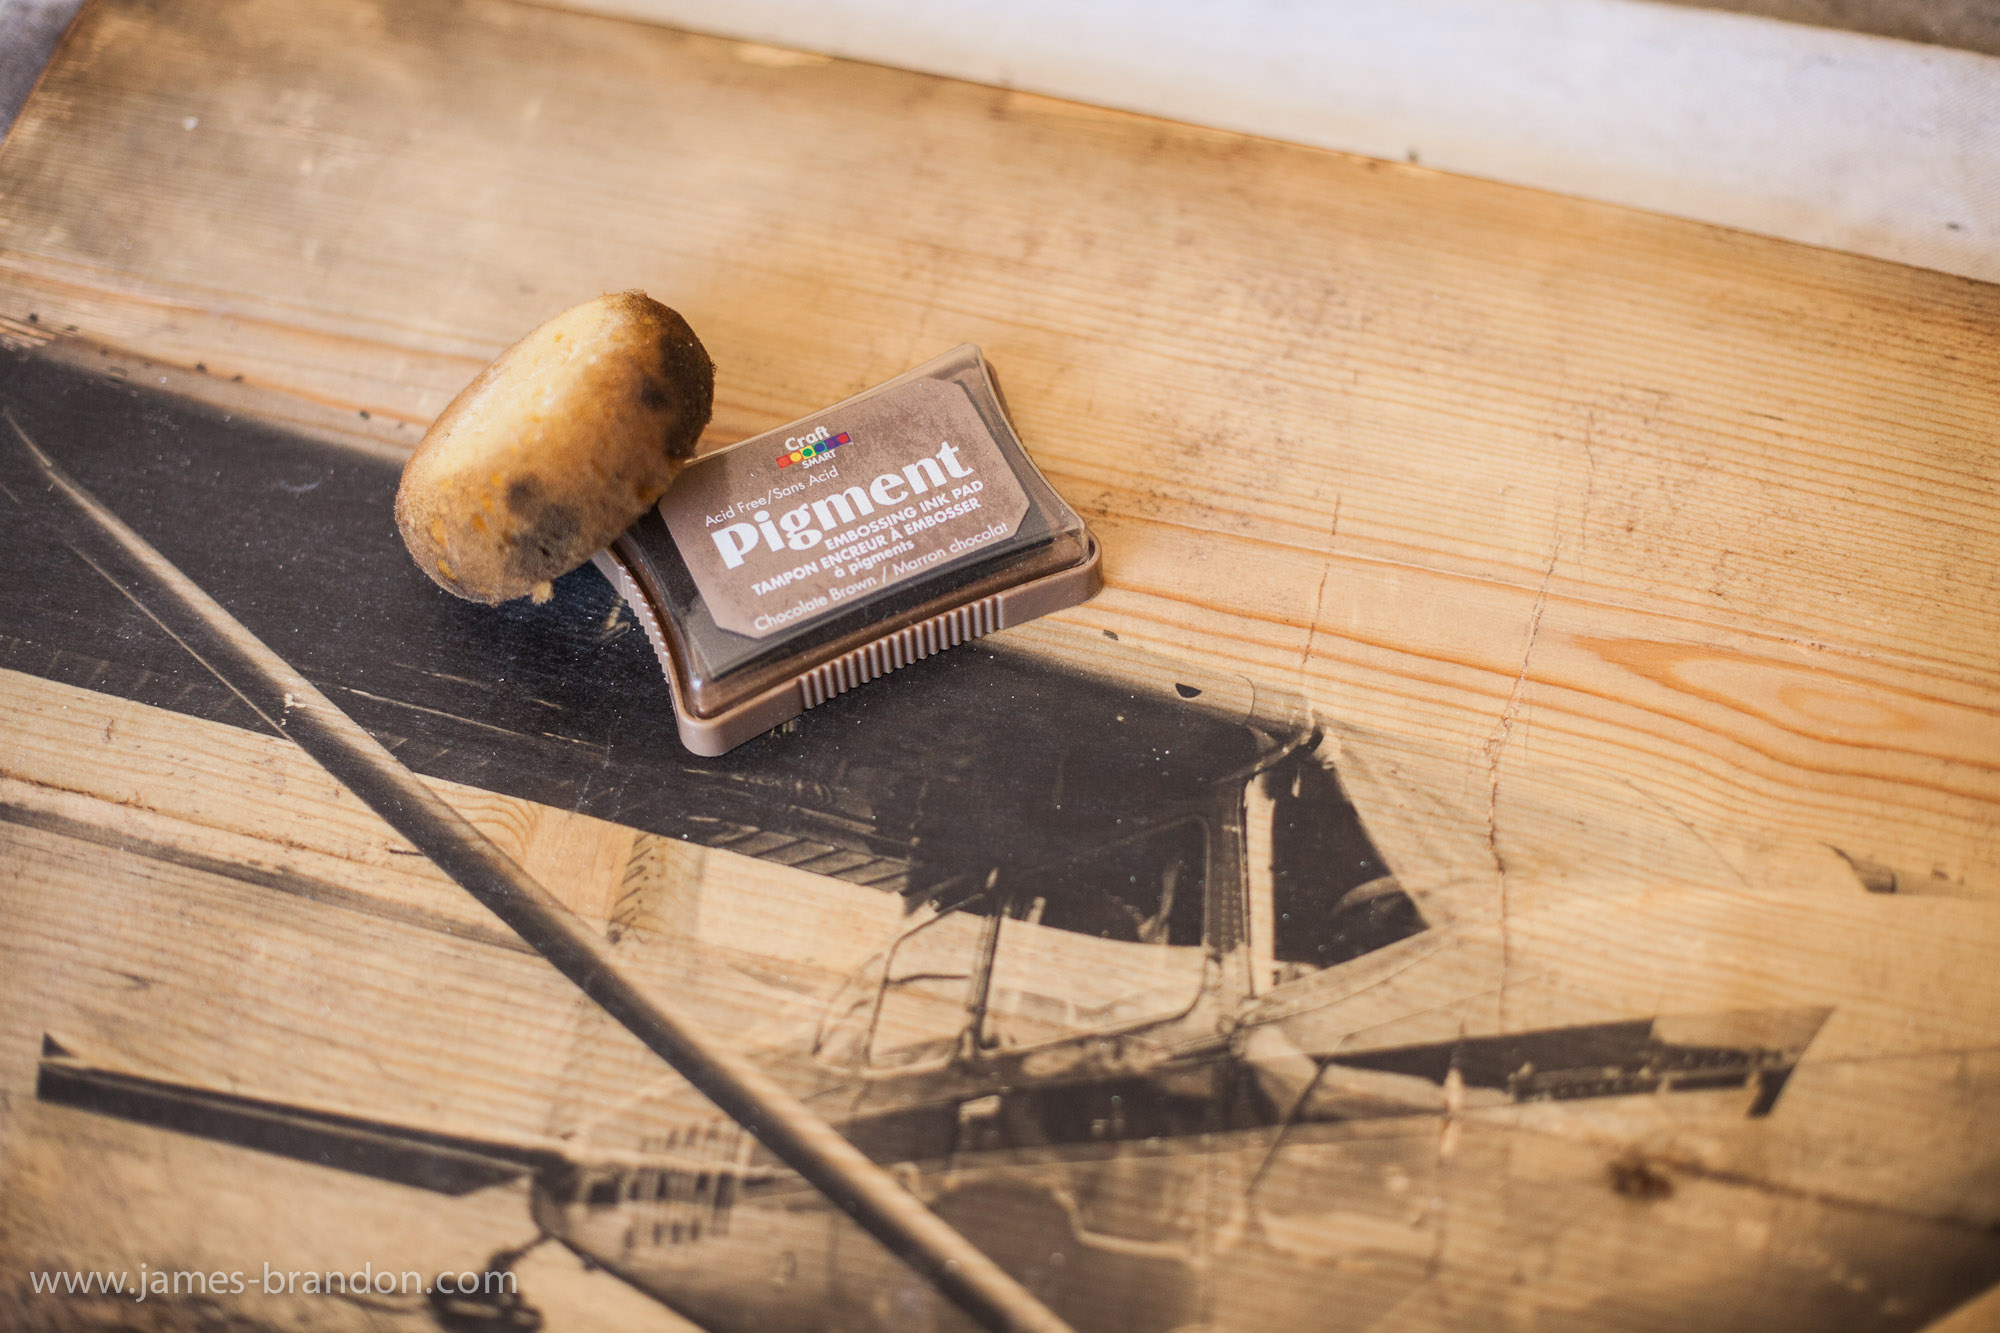
Next we sanded the edges to remove the excess gel and to distress the wood. Then we used a product called Pigment to distress the edges of the print (almost like a grungy textured vignette). Just use a sponge to apply this. It’s much darker than the wood stain so use it sparingly! This isn’t required but we liked the effect.
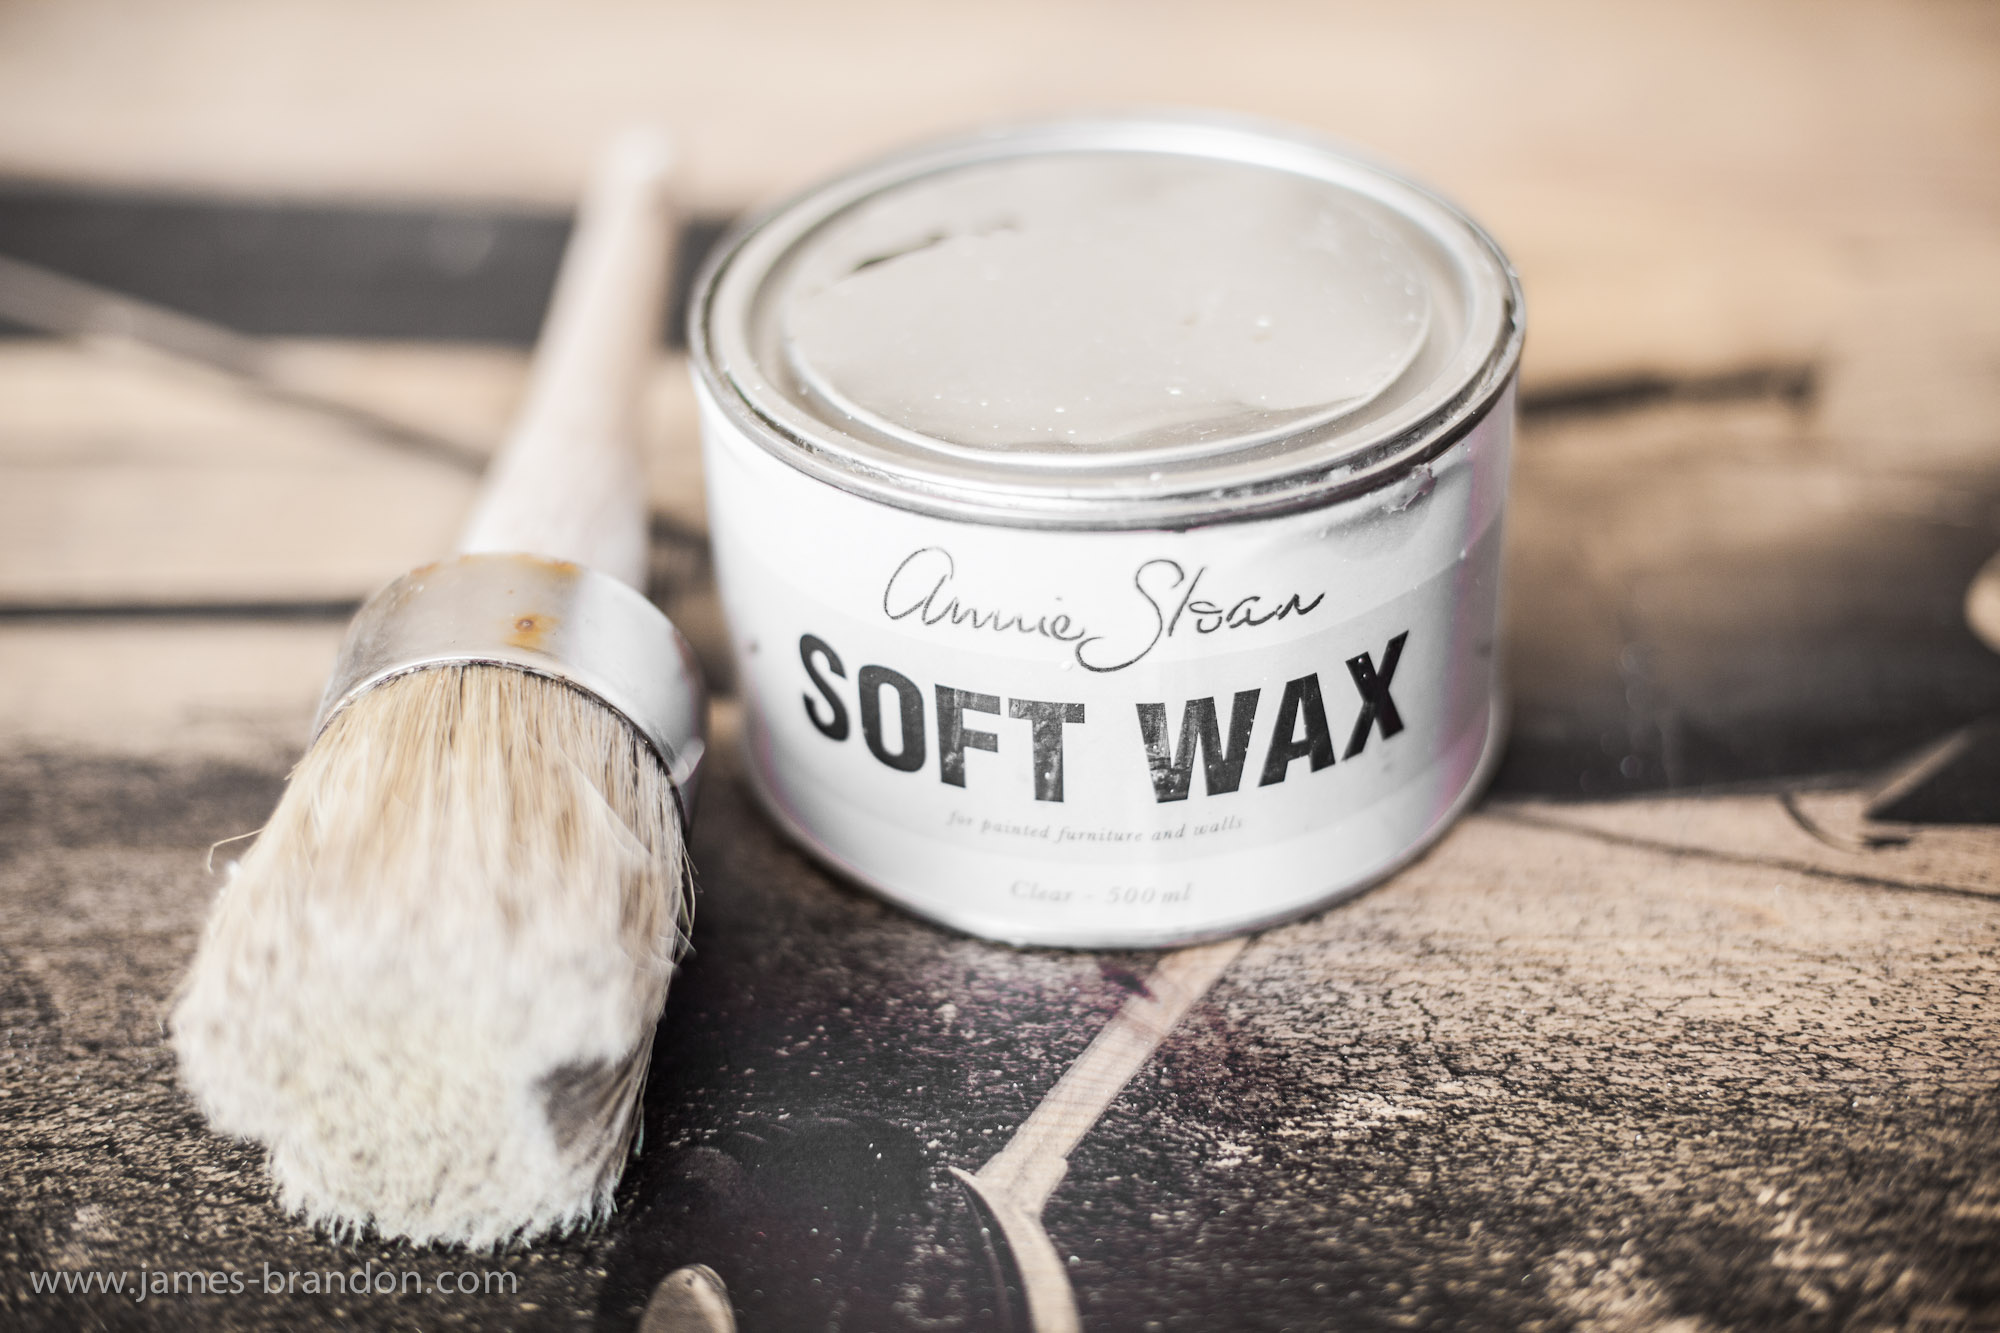
Finally, we added a layer of a product called Soft Wax to seal the print and make it all nice and smooth. Use a brush to apply a thin layer to the print. Just like waxing a car, let it dry and then buff it out with a cloth to smooth it out. The wax we used was, obviously, a soft wax. Not too glossy, not too matte.
Step 7: Hanging The Print.
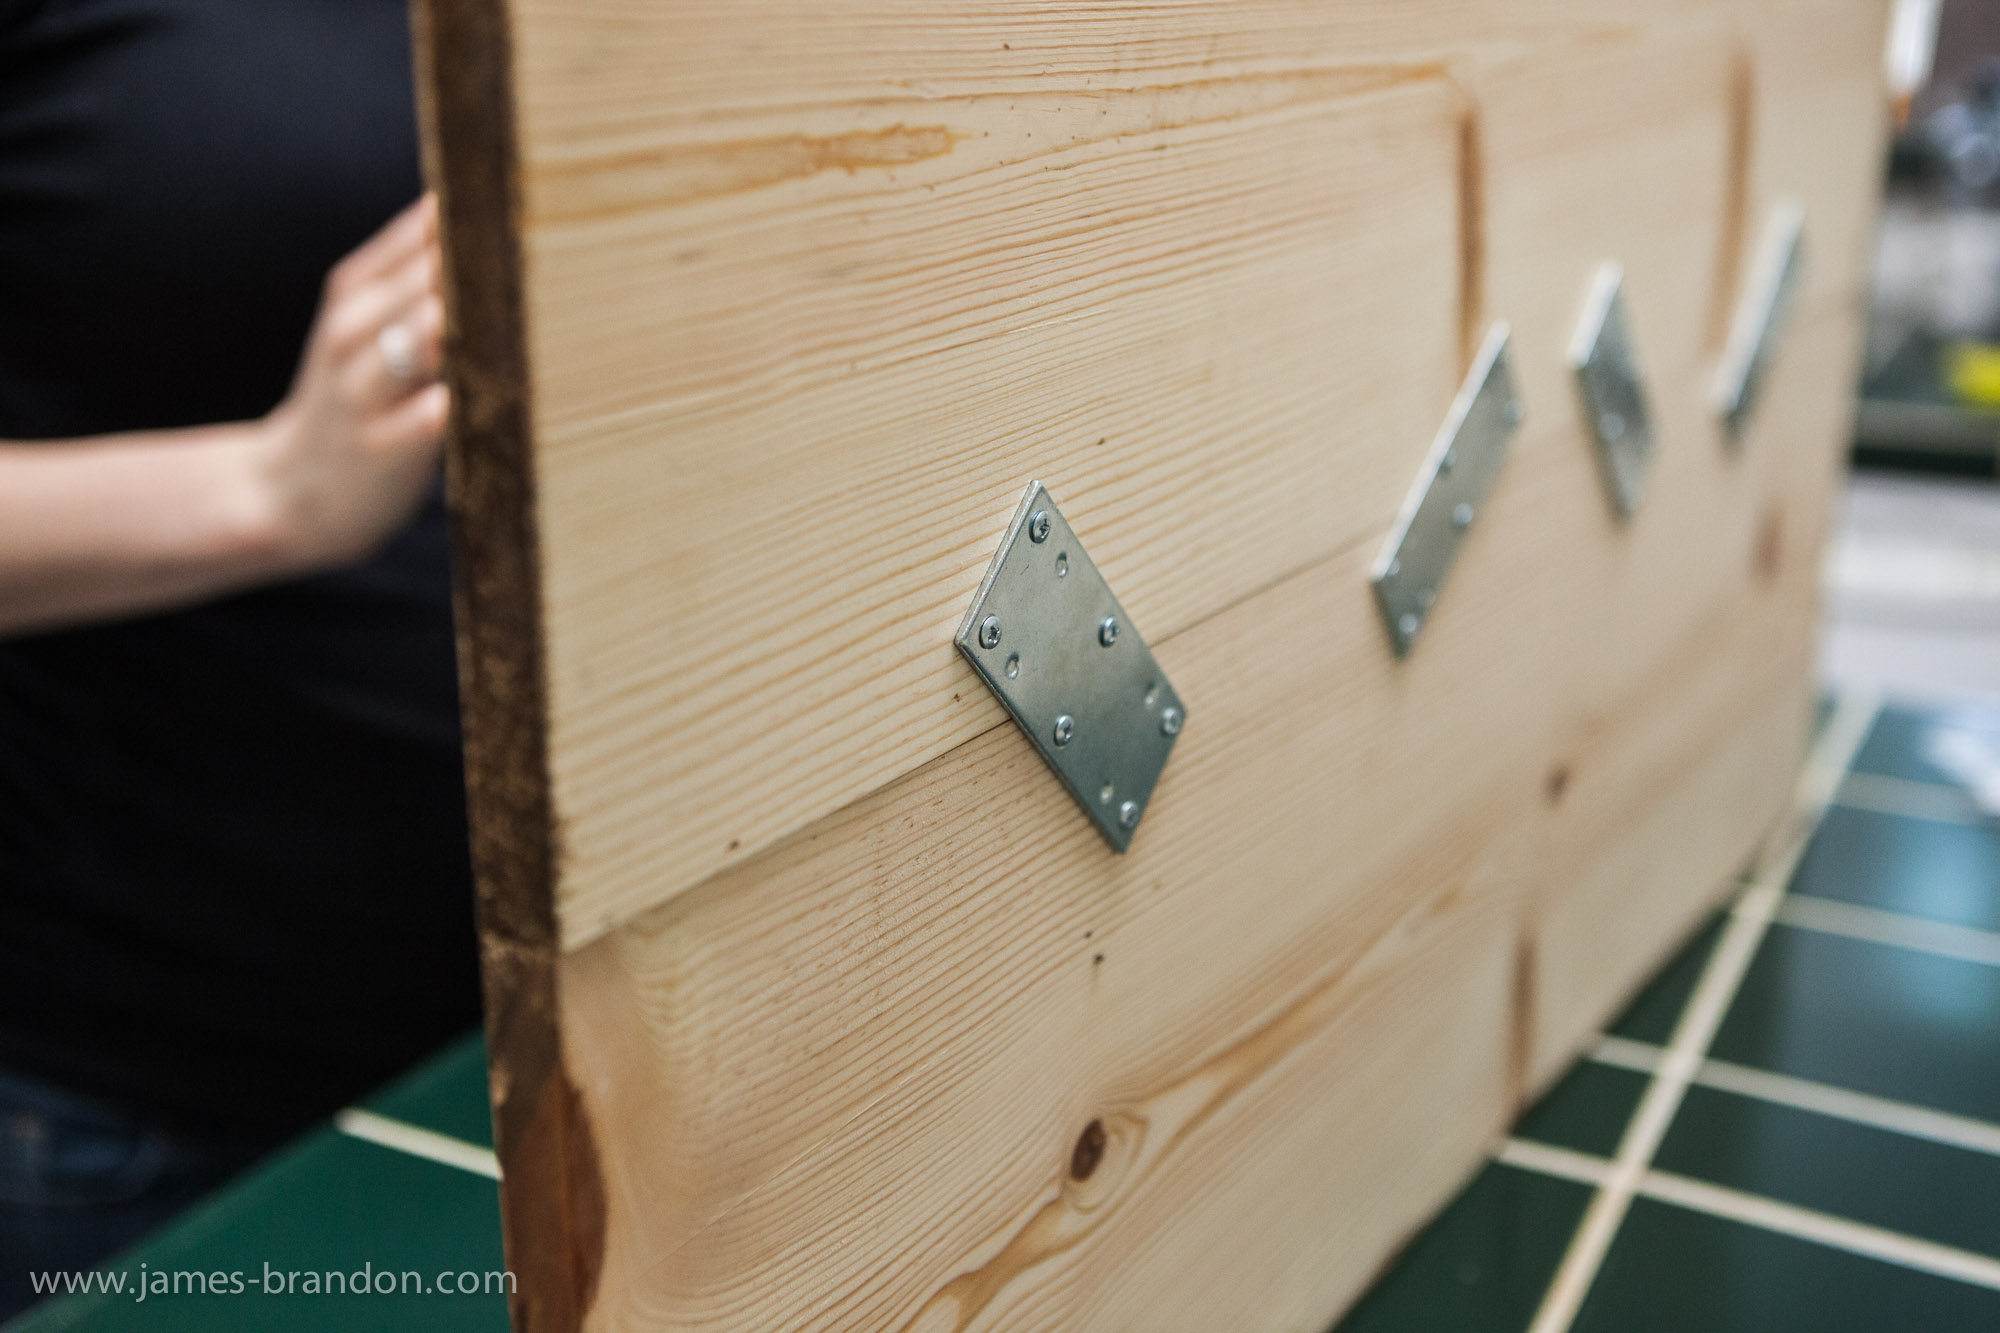
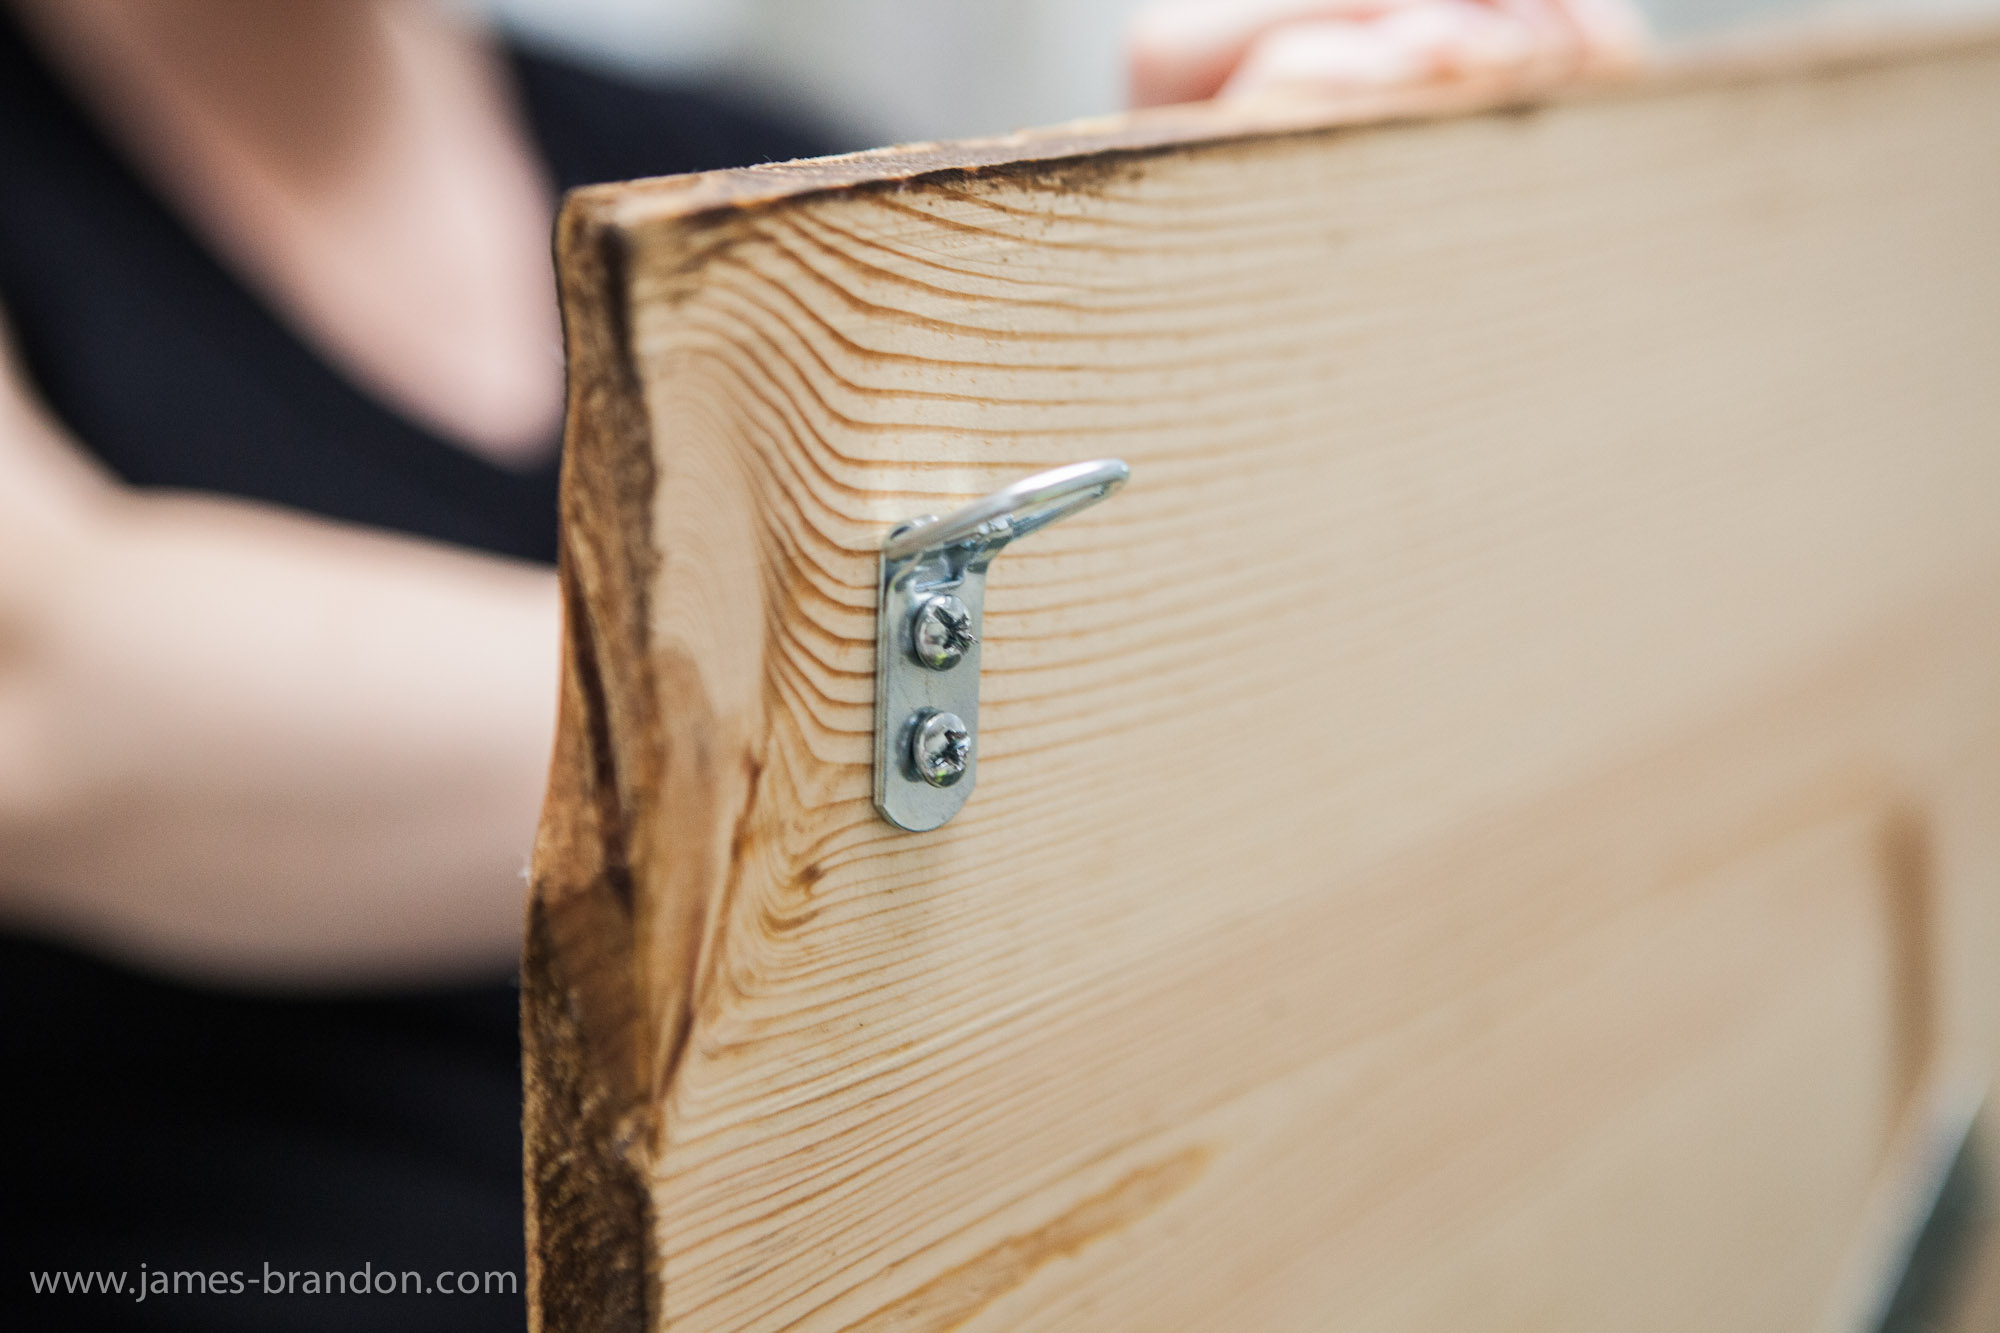
Since we used two pieces of wood, we needed some fastening brackets to make sure the wood stuck together. You can pick these up at any hardware store. I used four at different angles to make sure they never come apart!
Next I screwed in some mounting brackets to hang it on a wall. You can use any kind you want but I chose these. One thing to note: Be sure that the screws you use to mount the brackets to the back aren’t longer than your print is thick! I made sure of this before I screwed them in and still placed my hand under the print as I slowly screwed the bracket on to make sure I didn’t feel the wood expanding.
Conclusion
Well that’s it! The total cost of this project is around $95. If you use a product called Mod Podge instead of the Soft Wax you can save over $50 because you won’t have to use the wax or the expensive brush in the picture. Mod Podge is another product that can be applied with a sponge brush. It won’t look quite as nice but it still acts as a sealant. You also have to consider that this is the initial cost. The more prints you make on wood, the cheaper it gets since you would just have to buy a print, wood and gel medium the next time around. I hope this will inspire you to go out and try it for yourself! Once more, be sure to check out Katie’s Rose Cottage, they are always creating new things and you may just find something you want for your home.
If you’re not already, be sure to follow me on Google+ and Twitter. You can also follow Lori and Kristin too, I’m sure they’d love to hear from you!
Read more: http://digital-photography-school.com/how-to-transfer-prints-to-wood-an-awesome-photography-diy-project#ixzz2AteD6roz


